When we found out we were expecting baby #3, we knew that we'd have to make some bedroom adjustments. Our house has three bedrooms, so we decided to double up our other two children in order to leave the "baby's room" the same. The nursery is in the back bedroom, furthest away from the TV and noise, and it is closest to our bedroom. Plus, my husband and I did not want to take the crib apart.
So, Simon and Grace would be sharing a room!
I scoured Pinterest for cute ideas where a brother and sister shared a room.
Simon's room had been decorated in vintage cars. I didn't want to remove all those decorations because he loved cars! And I married into a car-loving family, so I wanted to continue that passion.
But Grace needed a girly space as well. She loved pink colors and butterflies and flowers.
For a one-year old, she has plenty of opinions.
Eventually I had a plan in mind for how to make a "Pinterest-worthy" room.
But then I couldn't find the fabric. Sigh. . .
So I went for the old-fashioned route of separating the room into halves.
Much easier than my plan to sew new bedspreads, curtains, and replace all the decorations.
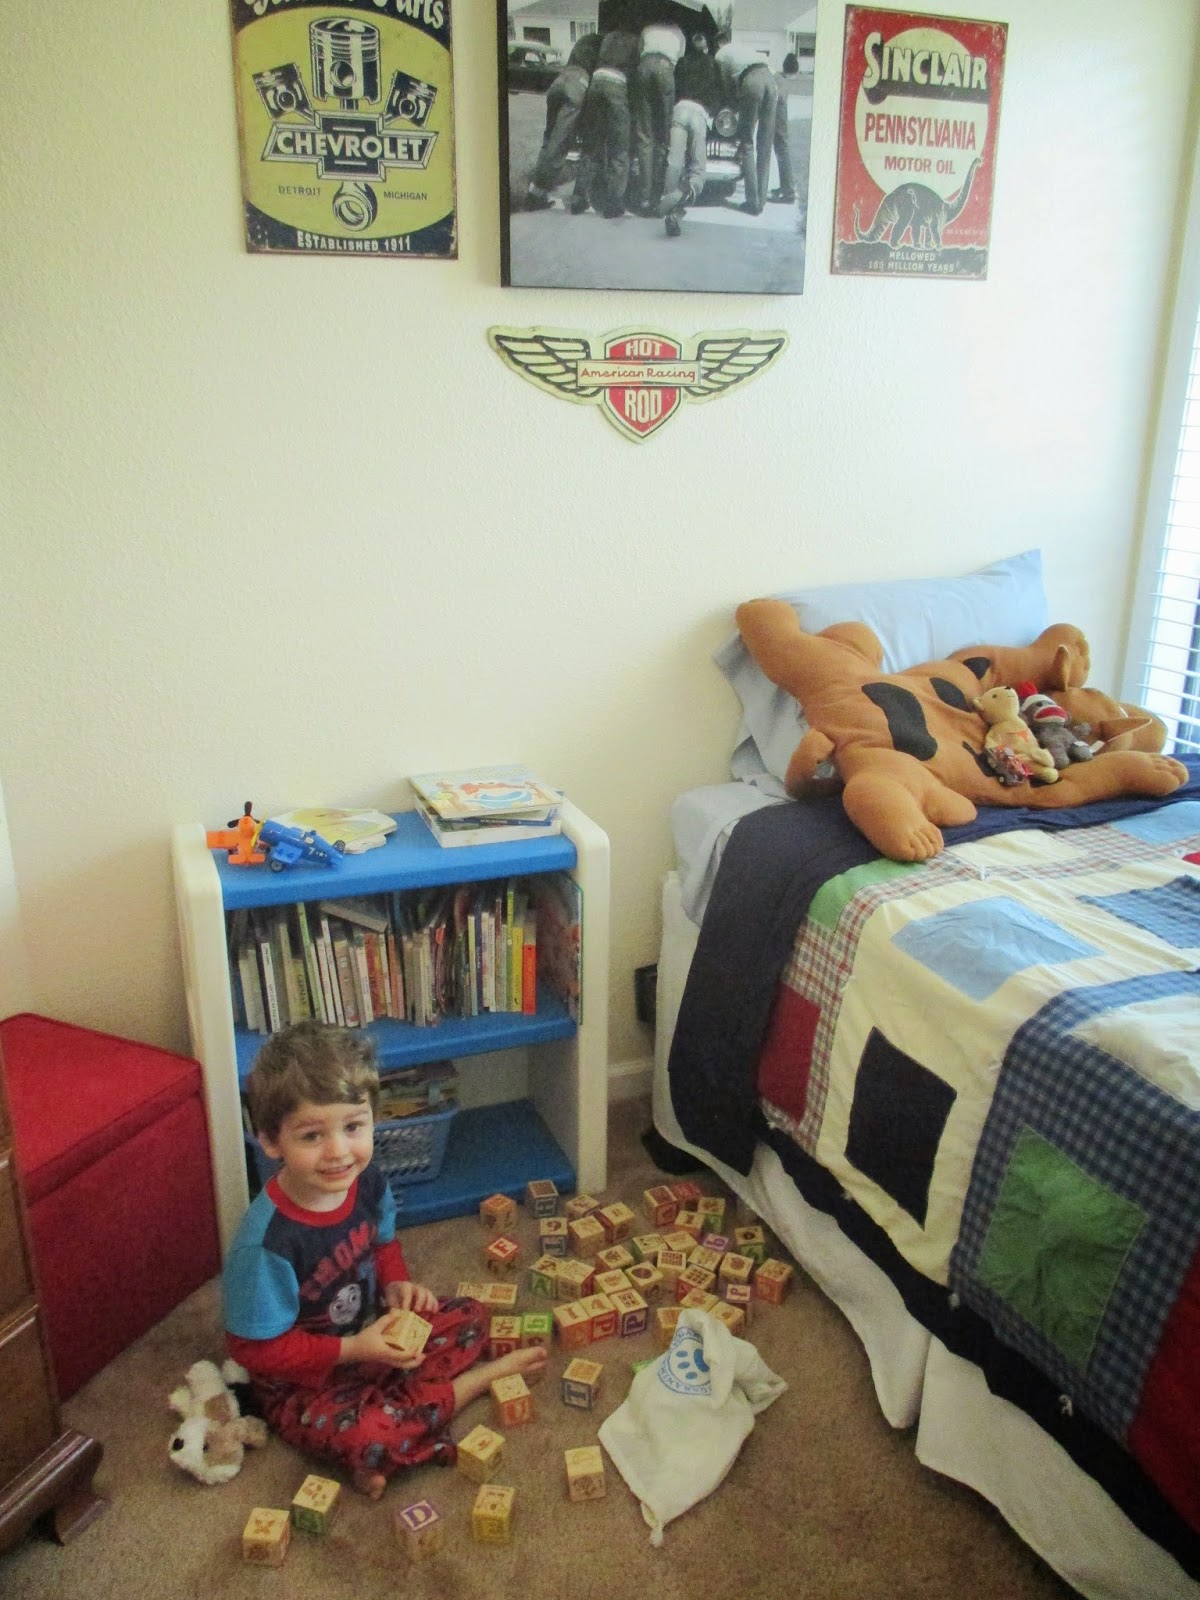
Simon's half of the room is still vintage cars (although many of his original metal car signs have been relocated to the garage.) He loves to point to the Sinclair dinosaur that survived the chopping block. The classic photo in the middle of the picture below is from Life Magazine. It was taken in the same town that Simon's grandfather grew up in; his grandfather actually knew the boy who owned the car!
Simon's car quilt is another one of my crafty projects, see that post
here.
They each have space above the dresser too. Grace has butterfly hooks, while Simon has Chevrolet hooks.
Grace loves her new big girl bed! It is her "butterfly bed."
I was most excited to put together the butterfly decorations for her wall.
Keep reading for the how-to:
First, I cut a branch off one of our trees in the backyard. I let it dry out for a few days, and then I pulled all the dead leaves off. Afterwards I sprayed it with a clear coat of spray paint.
I purchased tons of leaves and butterflies from Etsy's "Elite Paperie." Her die cuts were perfectly priced with an amazing color selection. I was able to match all the butterflies and leaves to the colors in Grace's bedspread. Check out her shop here:
https://www.etsy.com/shop/ElitePaperie2
Then I bought some thin wire from Lowes to attach all the leaves.
To attach the leaves: cut a 5inch piece of wire, wrap it around the branch, apply a piece of clear Scotch tape, and connect the leaf.
Thin, flexible wire allowed me to adjust the position of the leaf after it was secured with tape. And it remained hidden behind the leaf! The silver colored wire blended nicely with the tree bark.
This was the most time consuming part of the entire project. I attached almost 100 leaves!
Johnny helped me secure the branch to Grace's bedroom wall.
I love that he is a super handy guy.
I showed him where I wanted the branch to hang, and he studied the wall for a whopping 5 seconds and replied, "I know just how to make that work."
He went to the garage, grabbed some tools, and five minutes later it was done.
He attached it by first finding the stud in the wall. He attached one screw to the stud, leaving a bit of space between the screw head and the wall. He started wrapping some thick wire around the screw head. Then I held the branch for a moment while he wrapped the thick wire around the branch one time. He used pliers to finish wrapping the wire around the screw head behind the branch.
My smart, handy husband is awesome!
That alone was enough to hold the entire branch close to the wall, but we added one more screw just in case the kids tried to pull on the branch. That secondary screw was hidden under a spot where the branches and leaves met.
The butterflies were also easy to assemble.
I glued the butterflies into sets of three, so I could unfold their wings and make them look more dimensional. This way I ended up with eight butterflies per color. I used a glue stick to glue the middle parts of the paper butterflies together.
To attach the butterflies to the wall, I used that tacky, blue stuff that holds picture frames snug to the wall.
Simon and Grace both love having a "tree" in their room. And Grace is excited to have butterflies above her bed!
So far their room sharing experience has been great. The transition was much easier than we predicted.
Good luck to those of you are combining kids into the same room.
I hope you enjoyed the butterfly tree directions as well.
Labels: Happy Tidbits, Parenting